Objectives:
- To understand and be able to draw the magnetic field pattern around a current-carrying conductor.
- To be able to draw and understand the magnetic field patterns for a long straight current-carrying conductor, a flat coil and a long solenoid.
Electromagnets are produced from current carrying conductors. In fact any wire with a current flowing through it will have magnetic field around it as we will see.
The simple motion of a charged particle is what cause a magnetic field to be produced. Since current is the flow of electrons, each and every electron all contribute a small amount to a resultant magnetic field around the wire and it is this resultant field that can be detected.
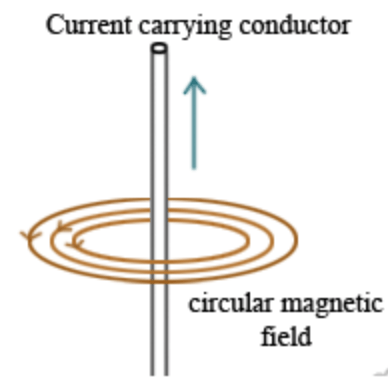 This image show that if the current flows upwards in the wire shown, the generated magnetic field is made up of concentric circles that are perpendicular to the wire itself, the direction of these lines are anticlockwise if you were to view the diagram from a birds eye view. The field lines spread out further and further the greater the distance you are from the wire itself. If the current were to be reversed, the magnetic field lines reverse direction swell.
The current is always the conventional current rather than the electron flow.
A completely vertical wire with a current flowing through it would have a magnetic field around it that would be quite difficult to draw (as we would only view it from side on). Therefore it is often convenient to draw the wire with the current going into or out of a piece of paper (or a computer screen). The following image shows this with the magnetic field around each wire.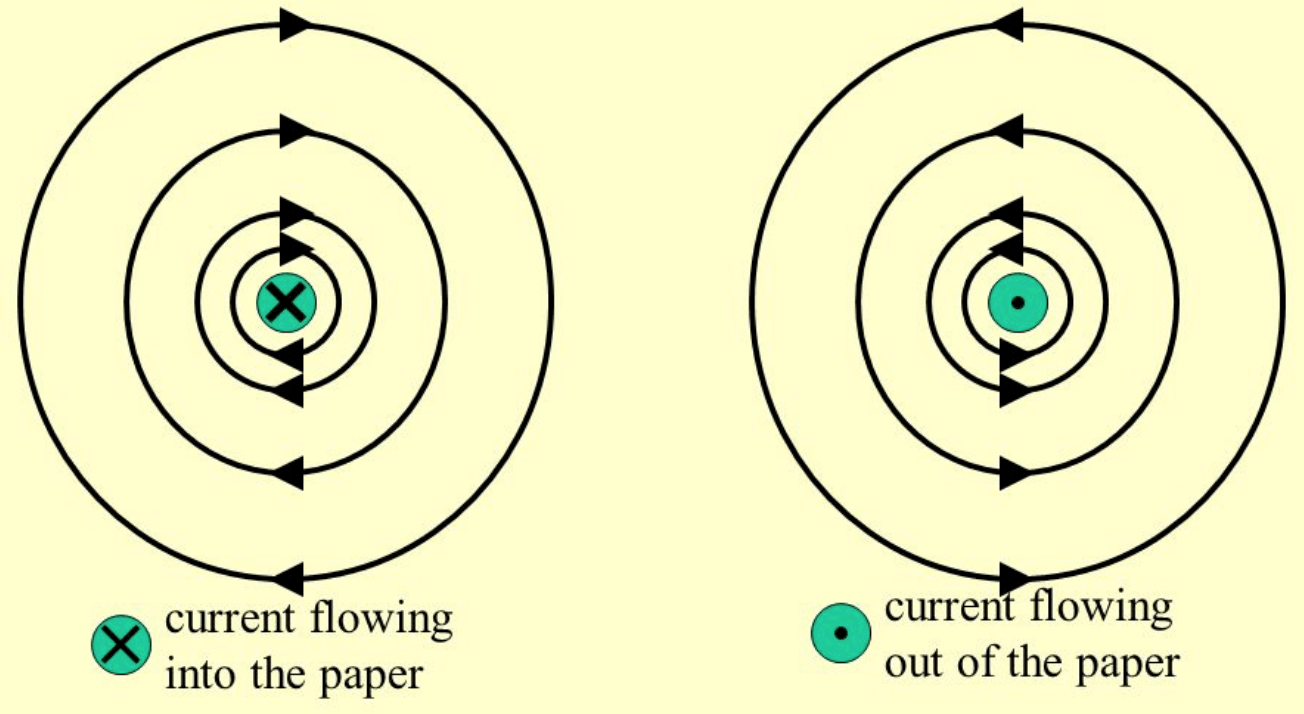 If the current is flowing into the page, the wire in the centre has a cross in it. If the current is flowing out of the page, the wire in the centre has a dot in it. One way to remember which is which is to imagine what you may see if a an arrow were fired at you. If it were coming at you you may see the head of the arrow with a sharp point (the dot), where if it were fired away from you you would see the cross made from the feathers.
The direction of the magnetic field is determined by using the right hand grip rule. This rule is carried using your right hand put into a thumbs up position. If you point your thumb in the direction of the conventional current, the direction your fingers point in represents the direction of the magnetic field.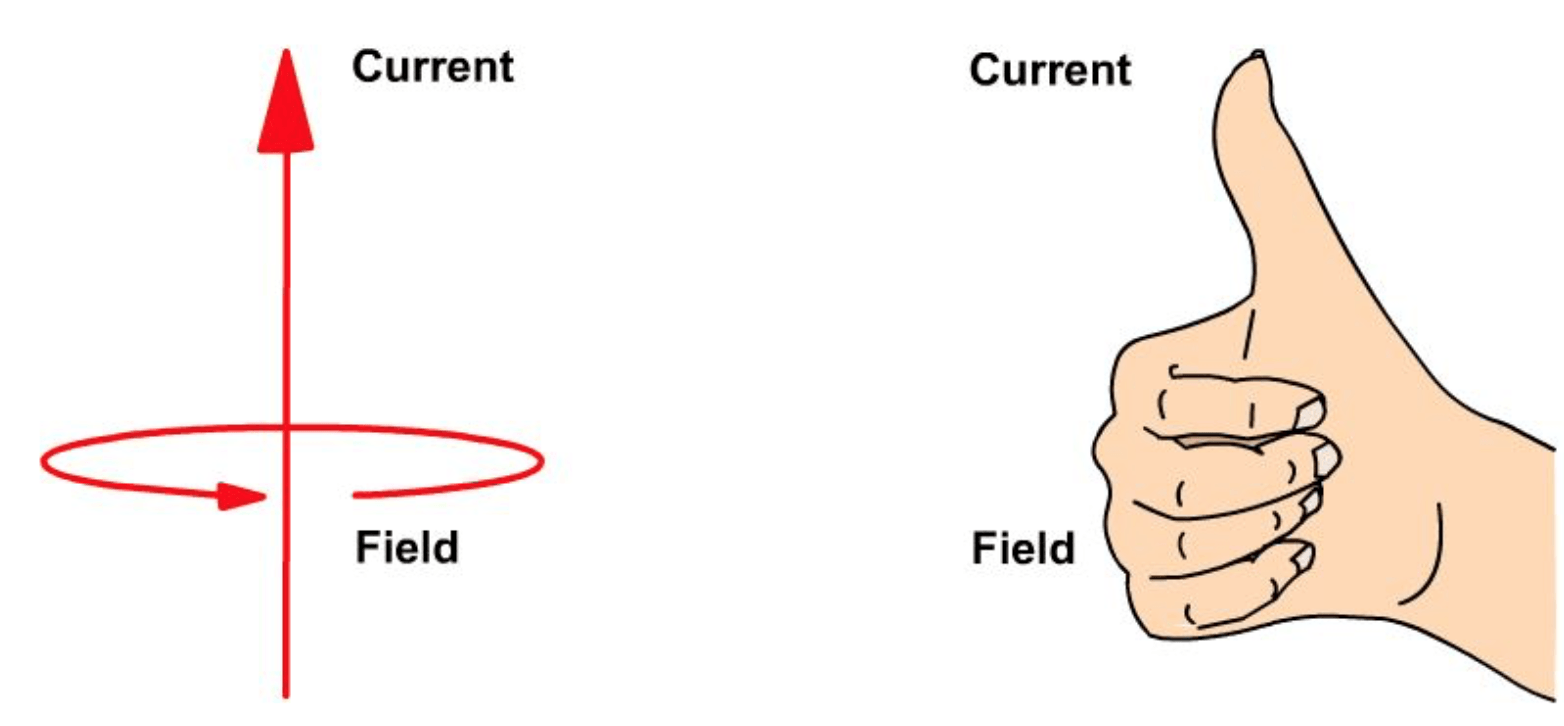
Magnetic field look like around a flat coil
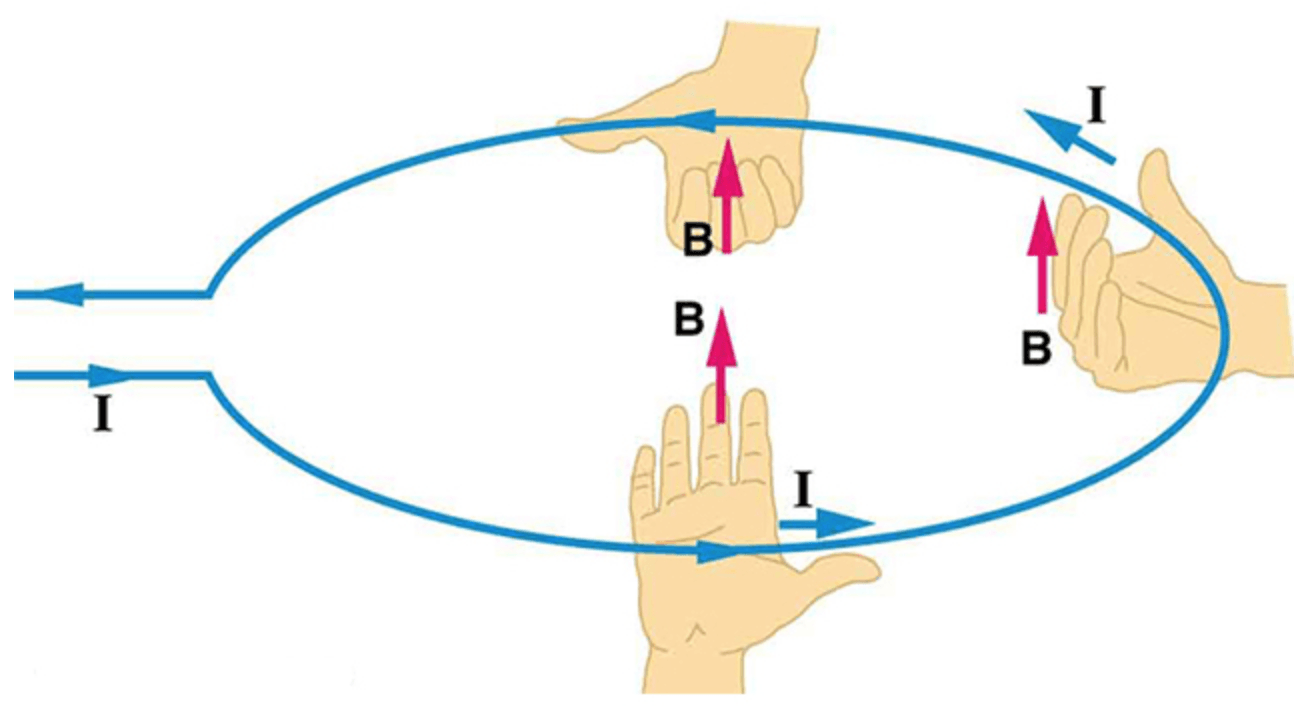 By moving your right hand (whilst doing the right hand grip rule) around the loop in the direction of the current as shown in the image above you will gauge an idea of what the magnetic field will look like. In the example above, the magnetic field, for the entire loop, has the magnetic field going upwards through the centre of the cold and would be down on the outside for the coil. As a result, the resultant magnetic field would look something like this;
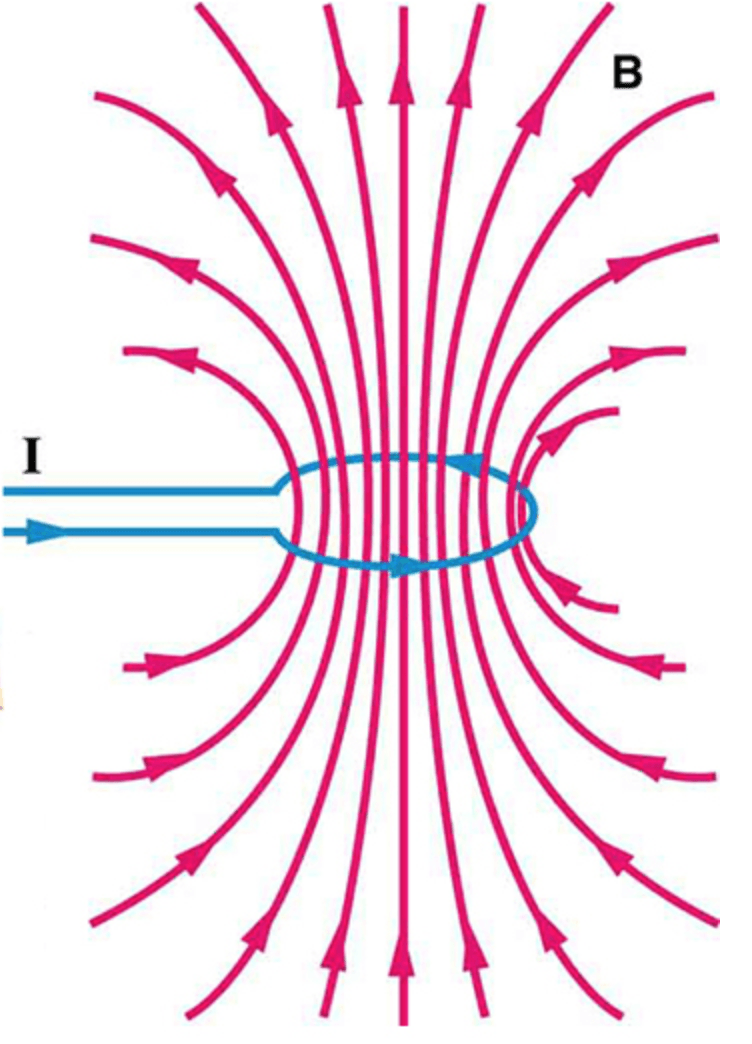 Th top of this coil appears like the north pole of a bar magnet and the lower side the south pole – this is evident from the direction of the magnetic field lines.
Solenoid
A solenoid is the name given to a coil of wire;
 With the current entering the solenoid on the left hand side and leaving on the right hand side, hopefully you can image in your head the current coming towards you at the top of the coil and away from you at the bottom of the coil. Because of this we can re-draw the top upper and lower parts of the wire with dots and crosses as outlined previously;
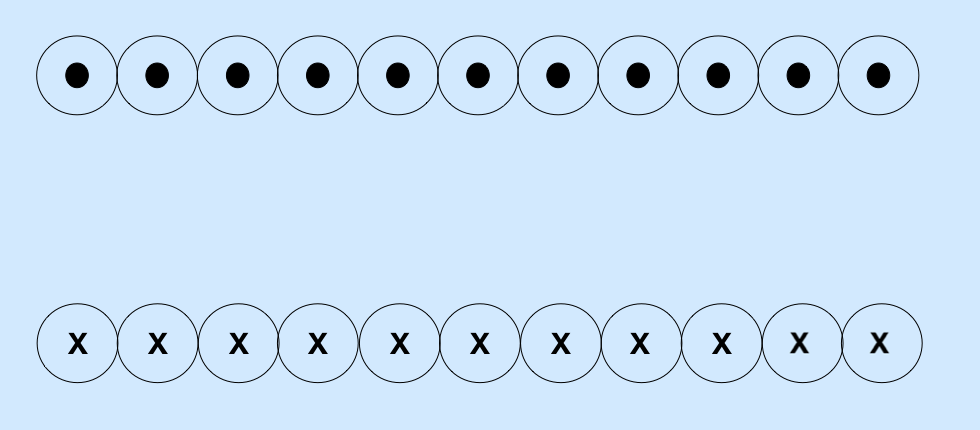 Using this diagram along with the right hand grip rule you can start to draw the magnetic field lines around each turn of the wire. So start with the top left we get;
 Draw a few more including those for the bottom turns and you can build ups a bigger image;
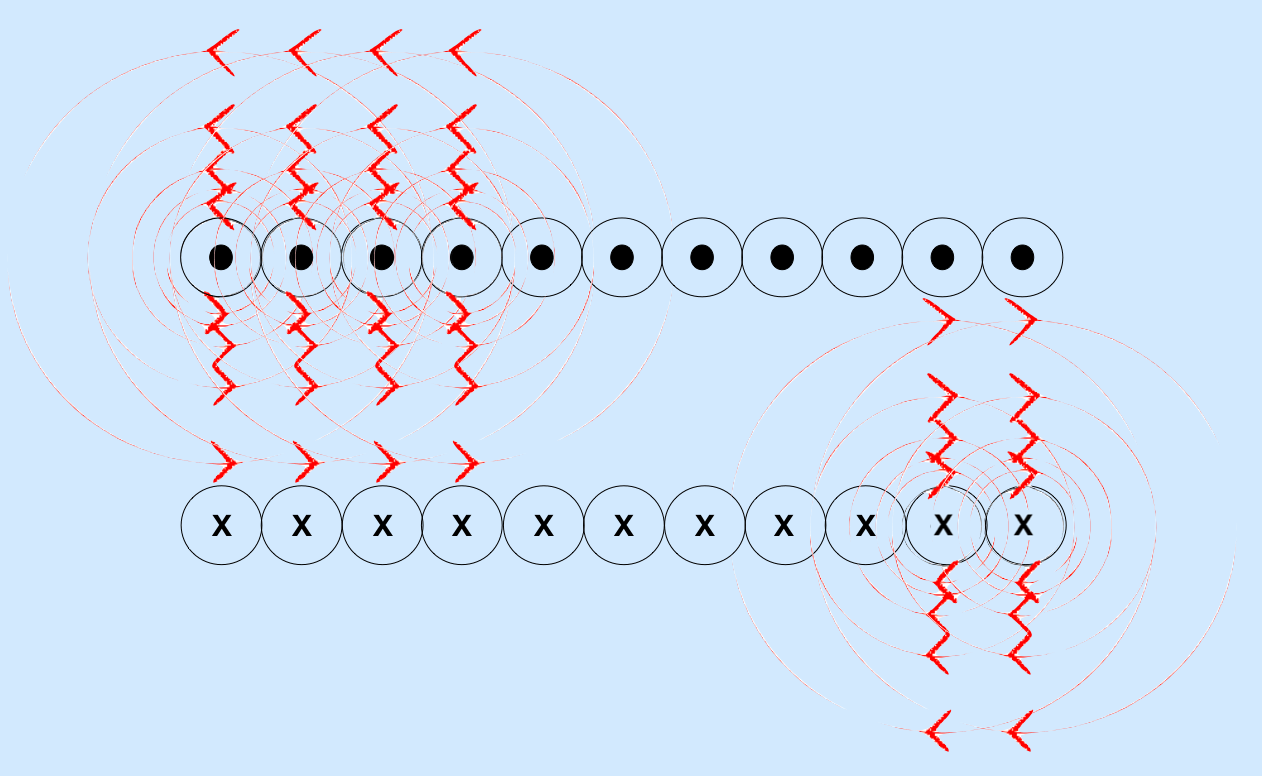 Remember that magnetic fields lines cannot overlap, instead they superimpose and in a way constructively or destructively interfere with each other. You should notice from the diagram above that the field is to the left in the middle of the solenoid, it is always to the right outside of the solenoid. The resultant field may look something like this;
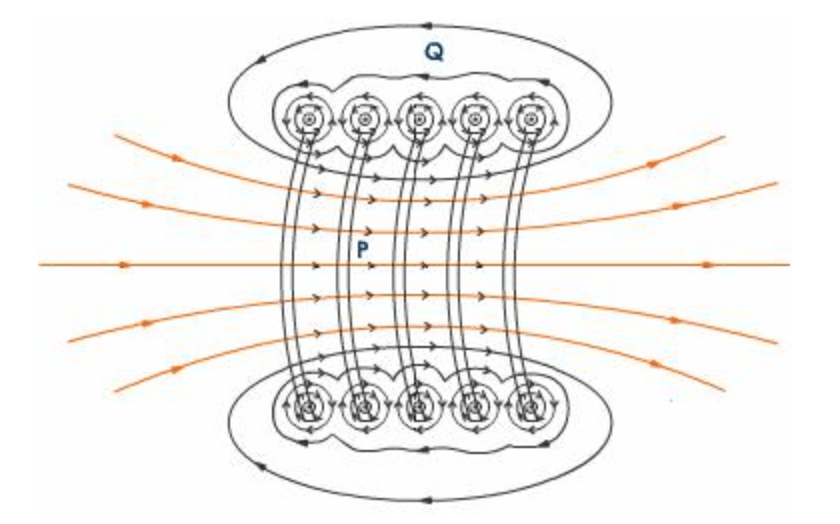
You should notice that at position Q, the field lines look a bit bumpy, this would occur if the current was too weak or if the turn of the coil were too far apart. By tightening the coil and increasing the current, the resultant field begins to become much more smooth;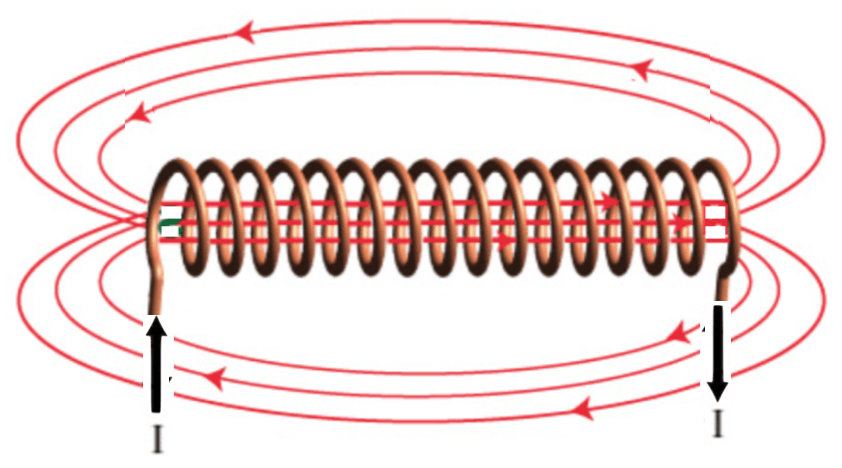 This sort of magnetic field should look familiar as it is similar to that of a bar magnet;
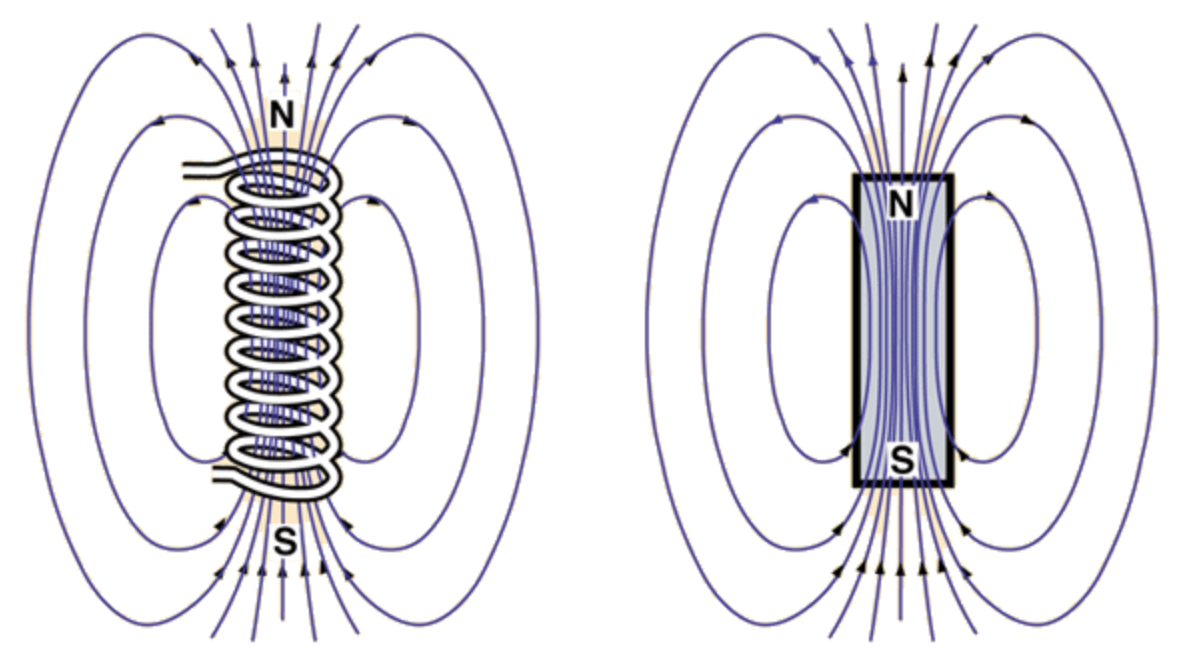
It is worth noting (so as to avoid confusion at a later date) that the magnetic field within a solenoid actually goes from south to north rather than north to south.
Which end of a solenoid is the north?
There are methods to help you determine which end of a solenoid has a north pole and which has the south, take the following image for instance;
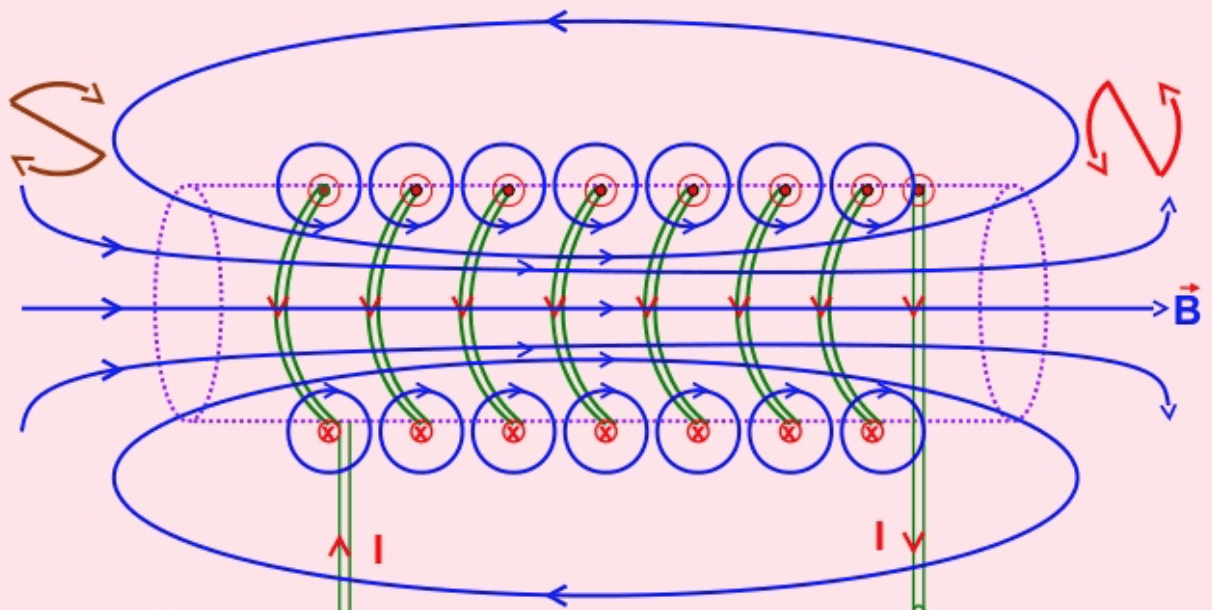 Imagine you were to look down the solenoid from either of the ends. Starting with looking from the left hand side, the current would appear to go clockwise. By drawing the direction of the current at the top and bottom with arrows and then connecting the tails of the arrows together form an S – for south!
Similarly, looking from the right hand side down the solenoid, the current appear to go anticlockwise, draw arrows on the left and right hand side and join up the tails of the arrows. The shape form an N – for north!
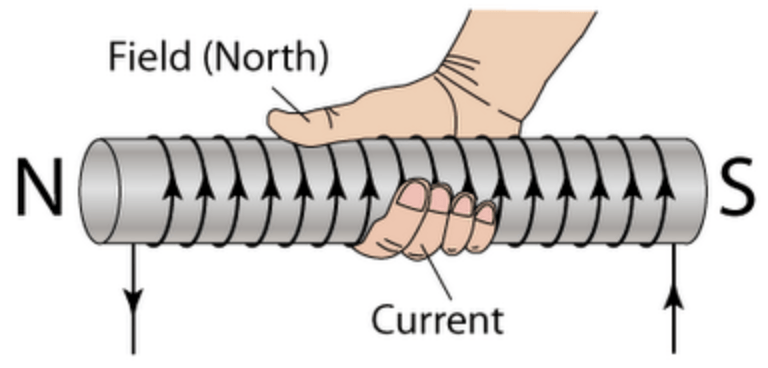
There is another method which is far easier but may muddle up with the right hand grip rule stated earlier. This is… if you were to grip the solenoid with your right hand, your thumb points towards the north pole
Further reading:
- Isaac Physics – Magnetic fields – This is a reading resource
You must be logged in to post a comment.